 |
| Jeff Hughes - Exhausted |
Addressing exhaustion is the first step to recovery in many diseases. There is a difference between tired and exhausted. Tired is when the body has had a long day, the mind and muscles have been well used and need a state of shut down for repair. Tired is a natural state and a useful one.
Exhausted is when you are completely used up, completely drained of all energy and empty. I think far too many people operate in the red zone of exhaustion and have to use crutches to get through the day. Crutches that later keep them from restful sleep and tissue repair and the vicious cycle of disease can set in.
 |
| Exhausted from www..joeygates.deviantart.com |
You cannot take on big life changing challenges when exhausted. You can’t just start eating well and exercising when you are exhausted even though those things are crucial to getting well. Changing life-long poor diet habits and learning new ways to eat and cook aren’t possible if you can’t even get up to go to work or are barely able to heat up a frozen diner for the kids. When you walk hunched over from just the weight of your head, changing your diet can seem as challenging as climbing Mount Everest.

Addressing exhaustion is the first step and the best way is to increase the chance of sleep.
I’ve had periods of my life that I was exhausted in every cell of my body; physically and mentally. I remember not being able to bend over to wrap up the vacuum cleaner cord. I had to pay the neighbor kids to come clean the litter boxes because I could do almost nothing where I had to bend down. Getting back up was too difficult. I breathed shallowly, nothing was interesting and everything was a bother.
 |
| VELASQUEZ Divine Drudgery |
Days when I could go to work were a complete chore and then coming home to the never ending tasks of daily life was just too much. Personal space for self- improvement was a laughable concept. The job, housework, bills, caring for my sick husband, the yard, the animals, cooking and cleaning were all a daily series of drudgery that I tackled with the enthusiasm of walking the plank; if I tackled them at all.
 |
| Drudgery by Edward Chambre Hardman |
If you think people look at you as if you are lazy or if you think that yourself, you might just be exhausted. If all you want to do is sleep, yes you may be depressed, but you may be depressed because you are exhausted in the literal definition of the word – to be empty. Empty of what the body needs to get through the day, what the mind needs to be able to prioritize tasks. If you are missing a craving for life and the need to create, if you look around your house and your life and all you feel is overwhelmed, if the bed is calling you like a high powered magnet at all times of the day, then you might be exhausted.
 |
| Fuseli The Nightmare, 1781. The man on her chest is one way some people see a common character called Bakhtak (there are many names) and he is sometimes seen with the old hag. |
During many periods of my life I’ve felt this way, but 13 years ago an illness so horrible finally touched me to the core and uncovered all my failings, all my weaknesses and opened me wide open to clearly see what I had become. I believe they were all related to being “empty” of what I needed to be a human being. Though they look like separate diseases, I think they were all just symptoms of one.
 |
| Heinrich Fuseli - Nightmare. |
I suffered from chronic sleep paralysis (or the old hag syndrome), RLS (restless leg syndrome), jaw clenching so bad that all my molars need repair & only ¾ are so far done, A-typical cataplexy which made it hard to walk at times, A-typical narcolepsy which required hospitalization, legs so heavy they were hard to move, joint pain, lowered immune system, horrible allergies, skin problems, liver problems, gall-bladder attacks, lingering female problems for 11 years that surgery couldn’t correct, migraines, depression, chronic back pain so bad I felt if someone would break my shoulder blade there would be relief, cysts migrating from under the skin near lymph glands that were wrapped in scar tissue began protruding from my neck and had attached to my spine, constant colds, and the list could go on and on.
 |
| The Old Hag, commonly seen in sleep paralysis. She is sometimes with a helper. |
 |
| One name for the Old Hag helper is Bakhtak, sometimes seen and sometimes not. |
But mostly what I remember is being exhausted all the time and incapable of living a normal daily life. Much of the time when I could get up was spent in the Dr’s office or at work which drained what few sparks I could find for the day.
 |
| soda bubbles by Pink Sherbet Photography |
If you take the lid off of a bottle of soda, eventually all the little fizzy bubbles will disappear and all you have left is lifeless colored sugar water. I felt like that flat soda, dense and dark, without appeal, thick and unable to move without any sparkles. Then one day I realized I wasn’t the soda, I was the fizz, the energy that had escaped. I had to find one fizzy bubble at a time to re-build myself into something I wanted to be. As I’ve told this part of the story many times, hands reached out to help me and I started to get well. One day I’ll tell the stories in whole as I’ve never done, but that day isn’t today.
I’m not going to outline what sleep paralysis is or any of the other problems I had. That would take a book. If you have the problem, you know what it is and if you don’t – then it doesn’t really matter. Though I hope anyone with exhaustion will receive some help from these tips.
There were specific steps I took that helped me fill back up and some steps recommended by experts in the sleep field that did nothing but harm. I’ve tried several times over the years to reach out to people with severe sleep disorders and the subsequent illnesses that come with it, but I’ve almost always shared too much. I further overwhelmed them by telling them everything I did. I got well, however it was one little baby step at a time, one course correction at a time. A 6 page outline step by step of what to do is just one more overwhelming task.

I’m going to do a series of posts outlining the steps that worked for me to get well. I’ve been told by an interviewer from the BBC that tracked me down, that I’m the only person he could find that was cured from narcolepsy and sleep paralysis naturally. I don’t know if that is true or not, but if it is, I certainly have an obligation to try to help others. I tried helping by joining sleep forums, but they were so unhealthy for me I had to leave. Too much focus on the problem, too many reminders of the nightmares, not enough conversation about healing.
The biggest thing to realize is that it takes time.
Some of the steps seem unnecessary and maybe even silly. If I’m listing them here though, they were important to me. This may not work for everyone and I’m certainly not a Dr. So I’m not making any health claims or prescribing a course of action.
 |
| Image - National Institutes of Health |
Imagine changing your whole body one cell at a time, one decision at a time; it’s not going to happen overnight, but hopefully for you it will happen.
In my next post I’ll go over steps I took to begin getting healthy, but first a few beginning tips for those with sleep paralysis that can be done when starting out from a point of exhaustion.
Some of these tips will help anyone with sleep problems. You don’t always know when you have a sleep problem however, but you do always know when you are exhausted. After one test I took at the hospital, I remember the next day how good I felt. I had slept that night and apologized to the tech when he came in that I was sorry they weren’t able to track my sleep problem that night. I assured him normally I don’t sleep. He told me I woke up 60 times during the night and never hit the target REM stage sleep. So just because you think you are sleeping, it doesn’t mean you are getting enough deep restful sleep.
These are NOT necessarily things I do now, but they were critical when I was trying to stop the illness. Now that I’m healthy and sleep restfully, I don’t need to do much of this. So these aren’t all long term things.
- Until I felt confident that the sleep paralysis was gone for good, I only slept on my left side with bent knees. This trick took a long time to discover and I wish I had known about it right away. Sleeping on your back greatly increases the chance that you will have a paralysis. Sleeping on your right side increases indigestion which can lead to nightmares. Putting a pillow behind your shoulder blade can help decrease the chance that you’ll roll on to your back in the night.
- If you have a cooperative partner, explain to them different signs that might indicate you are in distress. All they need to do is touch you to break the spell of a paralysis.
- One of the signs is a quiet breathy H sound. It’s from trying to scream help, but in a paralysis you can’t speak. Sometimes you can’t even get the H sound out.
- If they see you in bed with your eyes open and you don’t respond to them, they need to touch you to pull you out of it.
- If you sleep in a queen or king sized bed with a partner, it helps to replace the top sheets and comforter with smaller individual ones. We removed the king sized top sheet and comforter and replaced it with two twin sized sheets and comforters for each of us. When you actually do fall asleep, you want to minimize the risk that they will wake you by pulling the sheet across your body.

- Sometimes you can train yourself to move your index finger of your writing hand. When I discovered this, I started sleeping with a stuffed animal. Practice every night when you get into position looking at your finger and moving it to touch the animal. I’d keep it in my right hand until I fell asleep so it would be close. When a paralysis would start, sometimes I could focus on my index finger and get it to move enough so that I could touch the stuffed animal and come out of it. I also looked like a loon carrying it to work, but sometimes I had to sleep under my desk or in a co-workers van during the day when I couldn’t go on and was too tired to drive. I certainly didn’t want to have a paralysis at work.

- Start developing a good environment for sleep. No lights in the room what so ever. No little red LED lights on a VCR, no night light, no light coming in through the window. Put cardboard in your window if you have no other way of blocking every ray of artificial light. If you must have an alarm clock in the bedroom, I don’t recommend it, cover it thickly by folding a towel several times over. Then face it away from you. Do NOT look at the time if you wake in the middle of the night. Much of training yourself to sleep properly again requires reducing as much stress as possible. Seeing that it’s 3 am, for me, was too stressful because I knew the odds of falling back asleep were slim. The stress of knowing that could actually keep me from falling back to sleep. No music, minimize all noise. Make sure the path to the bathroom is the same as the bedroom, no lights, no sound. Blind people are able to use the bathroom without light, so that’s just something you need to learn to do.
- Pick a certain time every night that would be optimal for bed and stick to it. Starting the habit of a strict nightly routine will help train your body that it’s time to sleep.

- An hour before bedtime is when you start the process of rocking yourself to sleep and gently carrying yourself to bed. I’ll go over the steps of how to do that in my next post, but preliminarily know that you need to start winding down an hour before bed. NO exercise, no TV, no music, no bright lights. If you can, dim the lights or turn them all off and let just the moonlight fill the room. Sometimes a warm (not hot bath) an hour before helps and get dressed for bed an hour before as well. When it’s time to go to bed you want no activity except slowly and gently walking to the bed and getting in. I would ask my husband to go to bed first and get all his wiggles out before I came in. It's good to even speak in hushed tones and if you have children explain to them that temporarily you need the house very quiet an hour before bed. Having your wind down time in a chair in the bedroom is a good idea too to reduce walking time. But do NOT wind down in the bed. You need to train the mind that when you are in bed you will be sleeping. If it’s possible to have your room a bit cooler that sometimes helps.
- My sleep problems were so severe that I talked to my boss at work and got them to agree to be flexible on my arrival time. I know this won’t work for everyone. They agreed that if I got in by at least 10am that would be OK. Since I was still working an insane number of hours the weeks and months I was able to, they had no problem with it. I removed my alarm clock all together and gave my husband strict instructions not to wake me until 9am because sometimes I wouldn’t fall asleep till around 5-6am and just those few hours would make a huge difference. Nights I slept, I would naturally get up around 6am and get to work on time.

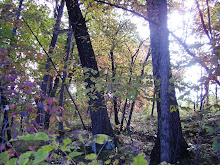
- Sit in the sunshine for at least 15 minutes a day. Let the sun touch your eye lids and long bones of your arms and legs. Breathe out long through your nose and then breathe in deeply, holding a few seconds before exhaling again.
- Any reduction in stimulants like caffeine during the day will help at night.
I’ll talk about methods of rocking yourself to sleep, meditation, visualization and diet and lifestyle changes in later posts. For now, let’s just keep it to the baby steps.
Here is to your restful sleep.
 |
| From NicePetsBlog.com |


